The Secret Behind Perfect Mandalas: Why Learning the Grid is a Must
Discover why grids are the secret behind stunning Mandalas and explore simple, creative steps to design balanced patterns. Ideal for beginners and enthusiasts looking to master the foundation of Mandala art.
MANDALA LEARNING
Have you ever looked at a Mandala and thought, “Wow, how is it so symmetrical and balanced?
Here’s the truth—no matter how creative you are, without a grid, your Mandala will always feel just a little off. The grid is like the skeleton of a Mandala. It holds everything together, keeps it neat, and gives you endless possibilities to explore new patterns with confidence.
Think of it like baking a cake: you can have the best ingredients (colors, pens, paper), but without the right base (the grid), your design may sink in one corner or rise unevenly in another. Learning to make grids is not about limiting your creativity; it’s about giving it the strong foundation it deserves. Once you master grids, you’ll notice your Mandalas becoming more precise, satisfying, and truly meditative.
Now the fun part—let’s actually learn how to make a simple grid for Mandalas! You don’t need fancy tools. Just grab:
A compass
A Protractor
A ruler
A sharp pencil
An eraser (for safety!)
A sheet of paper
Ready? Let’s grid it up!
Fun Steps to Make a Mandala Grid
1. Find Your Center – The Heart of the Mandala
Place a dot right at the center of your page. This dot is like the heartbeat—it keeps your whole Mandala alive and symmetrical.
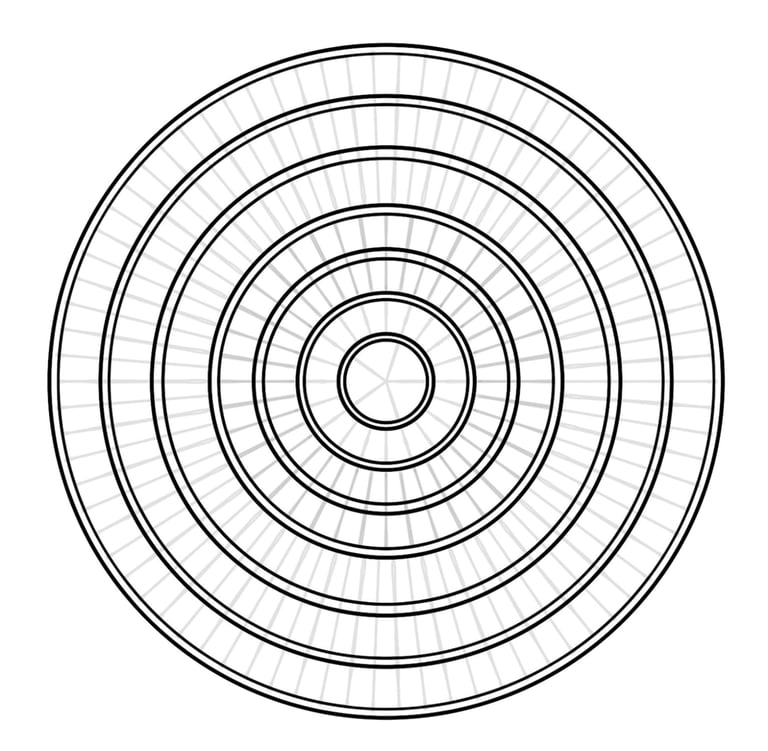
2. Draw the Circles – Like Ripples in Water
Use your compass to draw circles around the center, one after the other. Make them evenly spaced. Imagine dropping a stone in water—those ripples? That’s what your circles will look like. They will guide how big or small your Mandala layers become.
3. Divide the Pie – Slice It Neatly!
Now, take your ruler and draw straight lines through the center dot, just as you would slice a pizza or cut a cake. Start with one vertical line, then a horizontal one. That gives you four slices.
4. Keep Slicing – More the Merrier
Add more lines diagonally to achieve 8, 12, or even 16 slices. The more slices, the more detailed your Mandala can become. This is your creative playground—choose how many slices you want!
5. Check the Balance – No Wobbly Slices Please
Look closely: are all your slices equal? If one is too wide, erase and redo. Remember, symmetry is what makes Mandalas so mesmerizing.
6. Ready, Set, Create!
Now that your grid is ready, start adding shapes, petals, and patterns within each section. Your grid will keep everything aligned, so all petals look equal, all shapes feel balanced, and your Mandala will shine with perfection.
Why Grids Make Mandala-Making More Fun
When you work with grids, you’ll notice:
Your lines stop “running away” from the center.
Every design looks neat without extra effort.
You get more confidence to try detailed and complex patterns.
And the best part? Once you’ve practiced grids a few times, making them becomes so natural that you’ll wonder how you ever drew Mandalas without them.
So, next time you pick up your pen and paper, remember: a Mandala grid is not just lines and circles—it’s your secret superpower!